
Dolores Solar System V2.0
Solar Setup Version 2.0 - October 2022
So, after our first camper solar installation in June of 2022, we learned some valuable lessons. Generally speaking, the system that we had installed worked flawlessly for us over the whole summer. It did however have two downsides for us. The first was that the battery bank was simply too small for our energy needs, and the second is that the Goal Zero 500x had a max charge input of only 120 watts, which prevented us from just simply adding more solar panels to the system so that we could have charged the battery more rapidly than it was being depleted. So after our rainy and cloudy summer in Alaska, we started to consider how we might improve this system, while still keeping the main guiding principles of simplicity and affordability at heart. What we came up with was a blend of the system that I had built on Peanut a few years ago and this newer system that we were just running in Dolores. Below is a list of the parts that we used and a little more detail about how it all works together now.
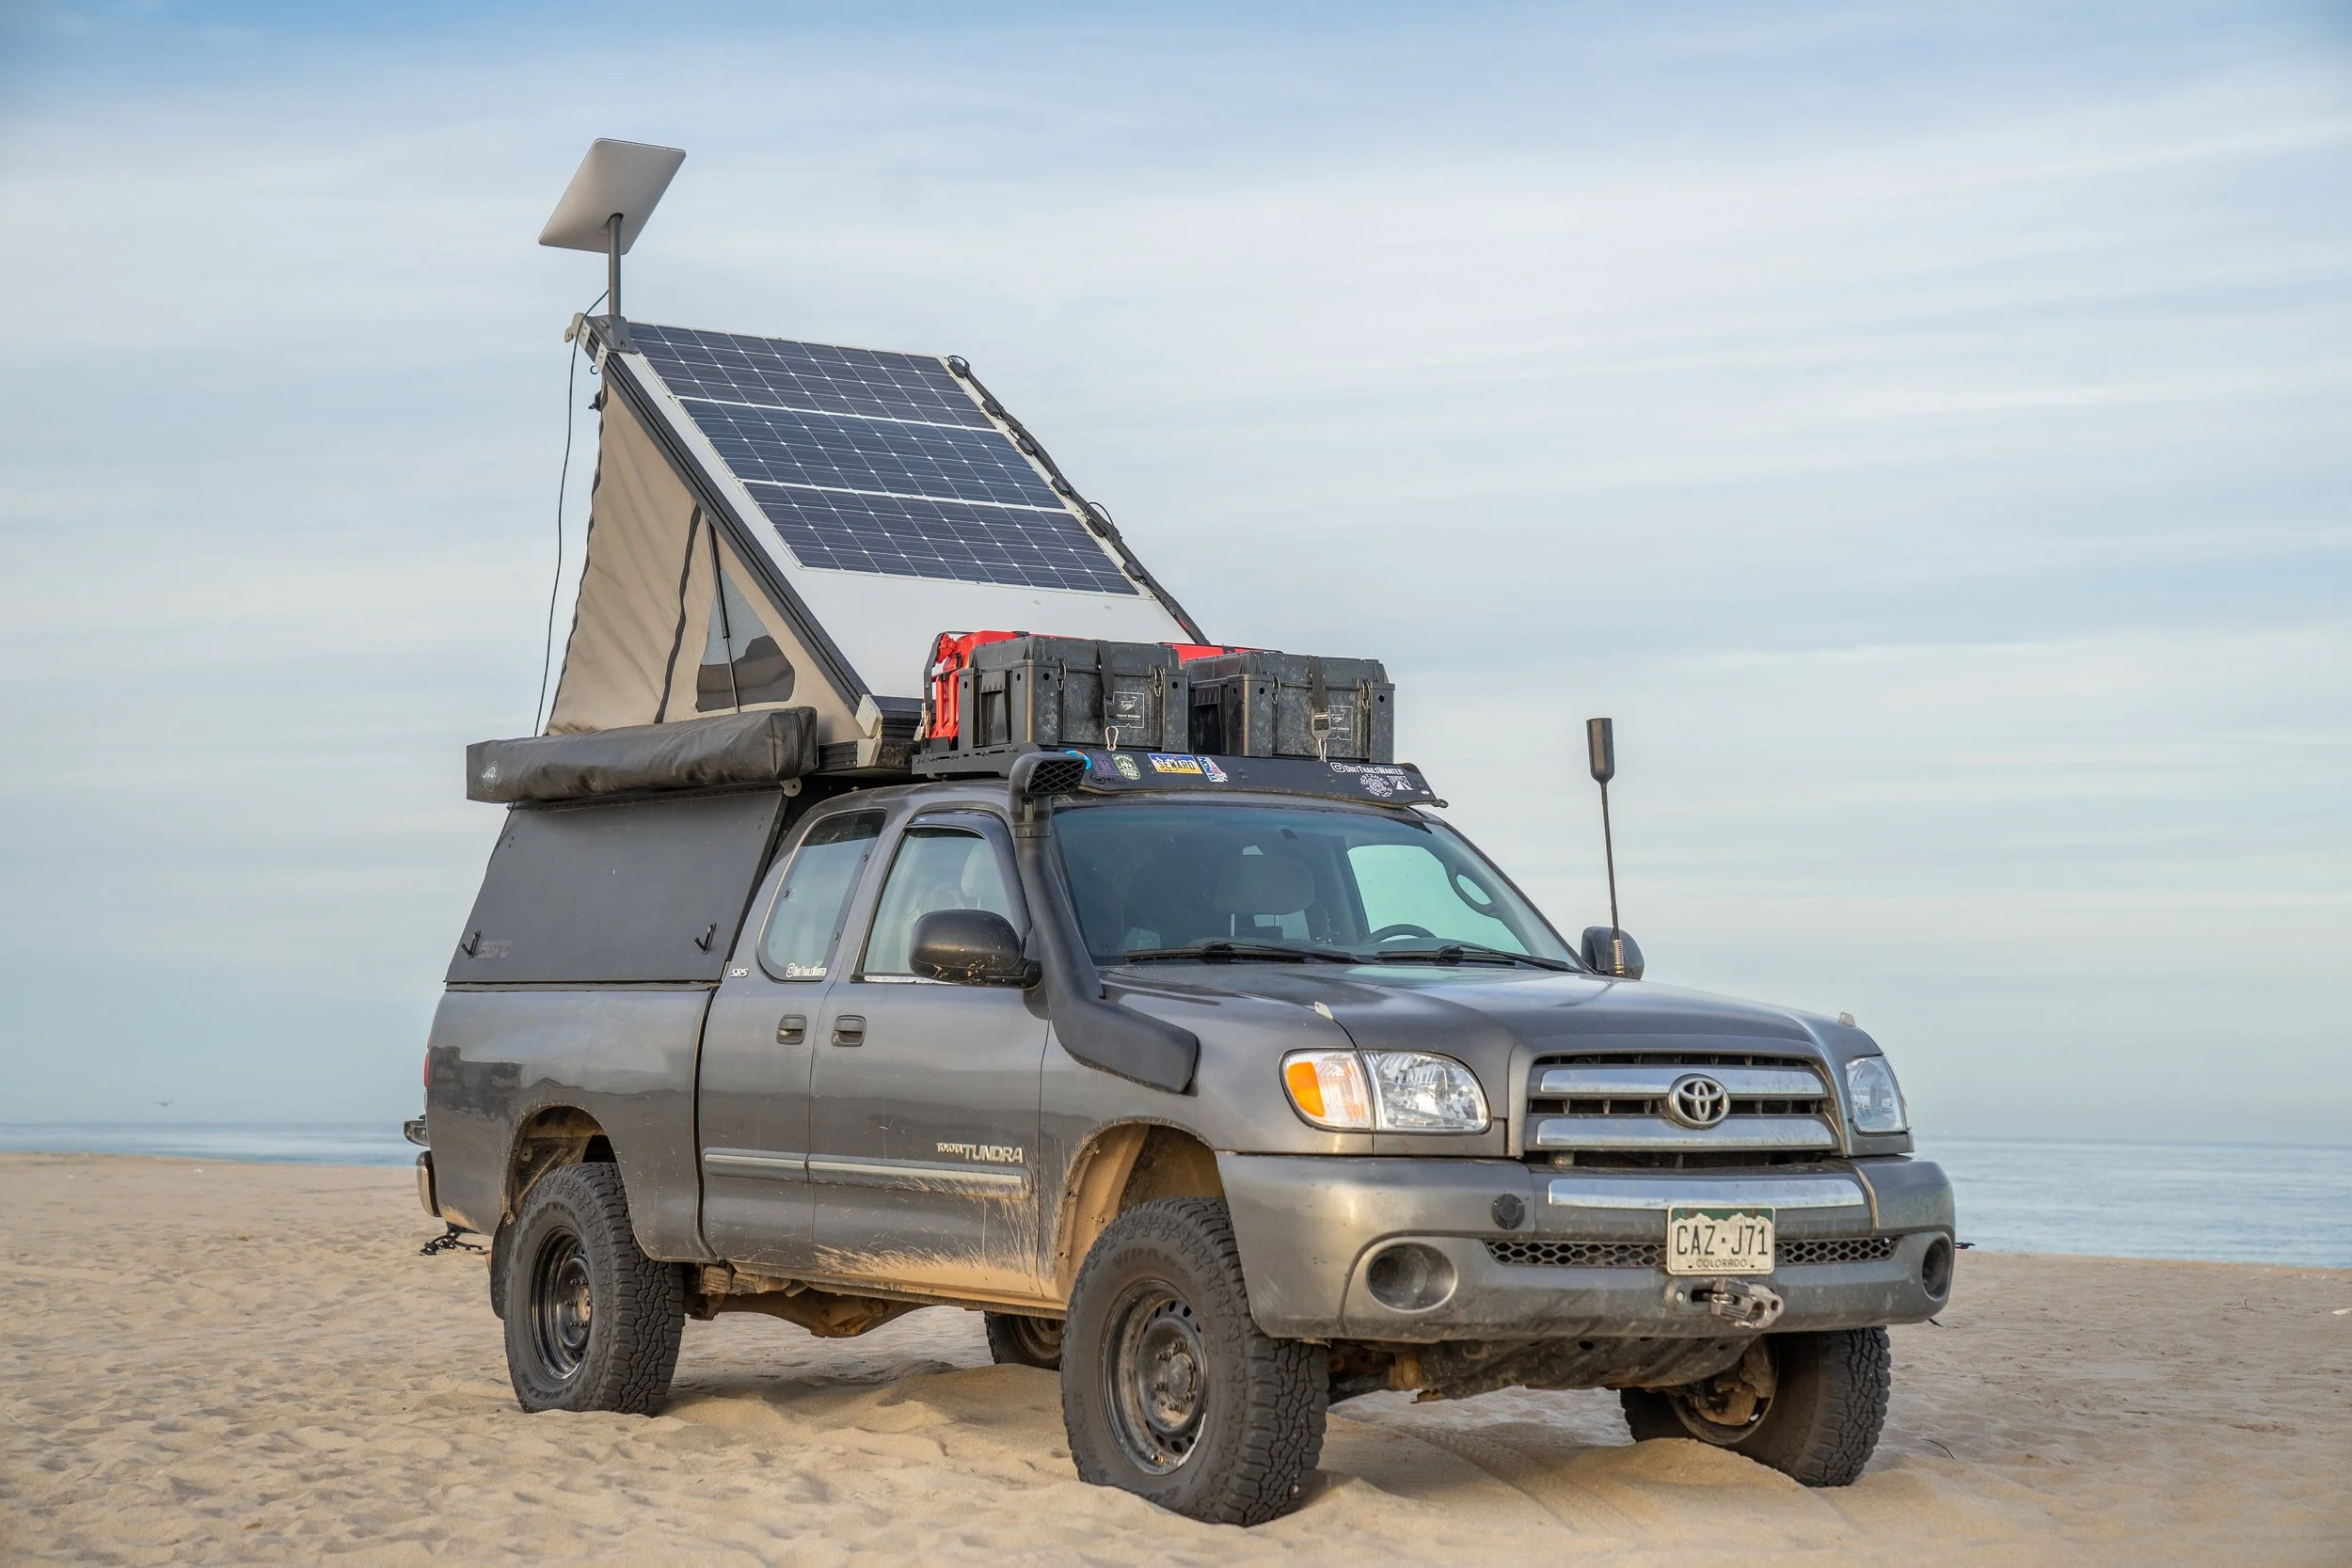
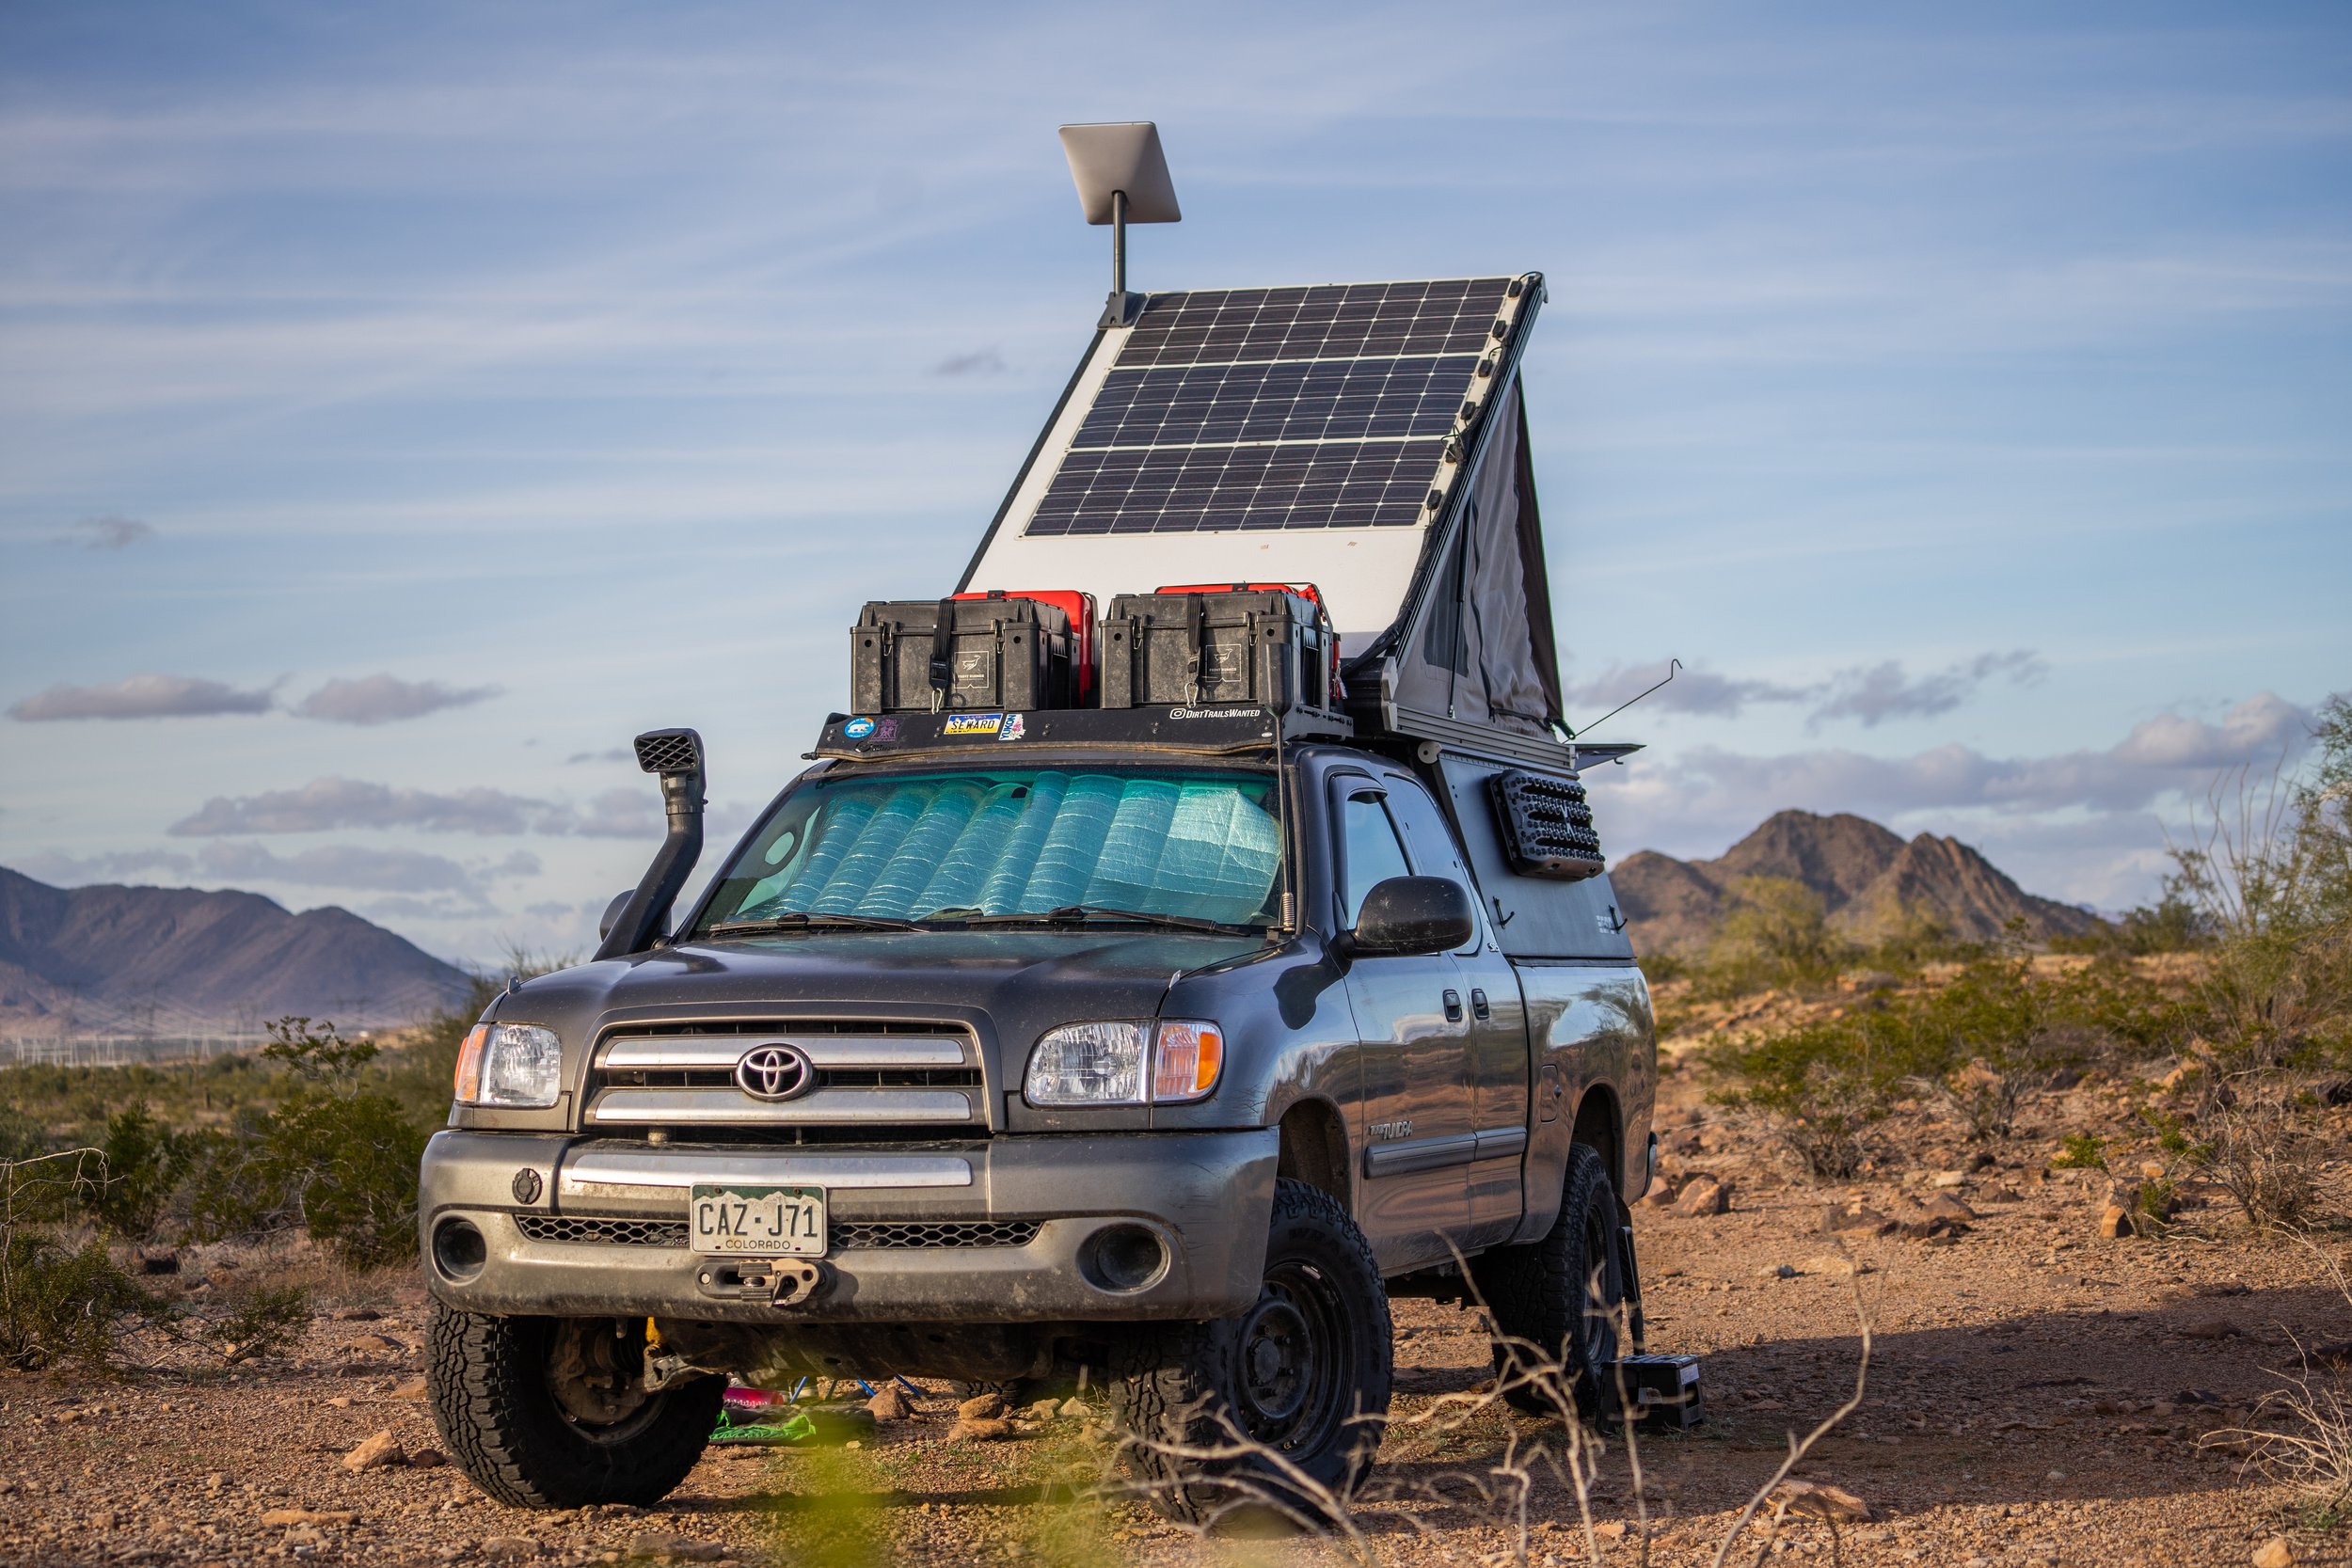
1) Renogy Flexible Solar Panel 100 Watt Solar Panels
We again went with the same panels that we had used earlier. However, our plan with them this time was to combine 3 panels together in parallel to make a total of 300 watts on the roof. This would allow us to charge our system faster than we were able to previously. We also chose to wire them in parallel rather than in series so that in the event that one panel becomes shaded from a tree or telephone pole it only affects the output of that single panel rather than the whole set of panels. There are pros and cons for stringing in series vs parallel but I believe that for the majority of systems, parallel makes the most sense.
2) Goal Zero Yeti 1500X Portable Power Station
We decided also to stick with the Goal Zero line of batteries for the same reasons that we had chosen to go with our previous 500x battery. One of the real perks of this system is its relatively small size compared to a system built of individual components. Having the charge controller, battery, inverter and all the needed plug ports built into the battery vastly simplifies the system and reduces the space needed. Aside from offering 3 times the energy storage of the previous battery that we used the feature that really sets this one apart from the previous is the max input for charging. The 500x has a max input of only 120 watts where as the 1500x has a max of 600 watts. That difference means that we can build a larger solar system that will hopefully allow the battery to charge more quickly than it’s being depleted and also means that on cloudy days we have a larger system that will still generate a low but acceptable amount of power. The battery also has the ability to be rapidly charged from a wall outlet at 600 watts and could be fully charged from dead to full in just over 3 hours.
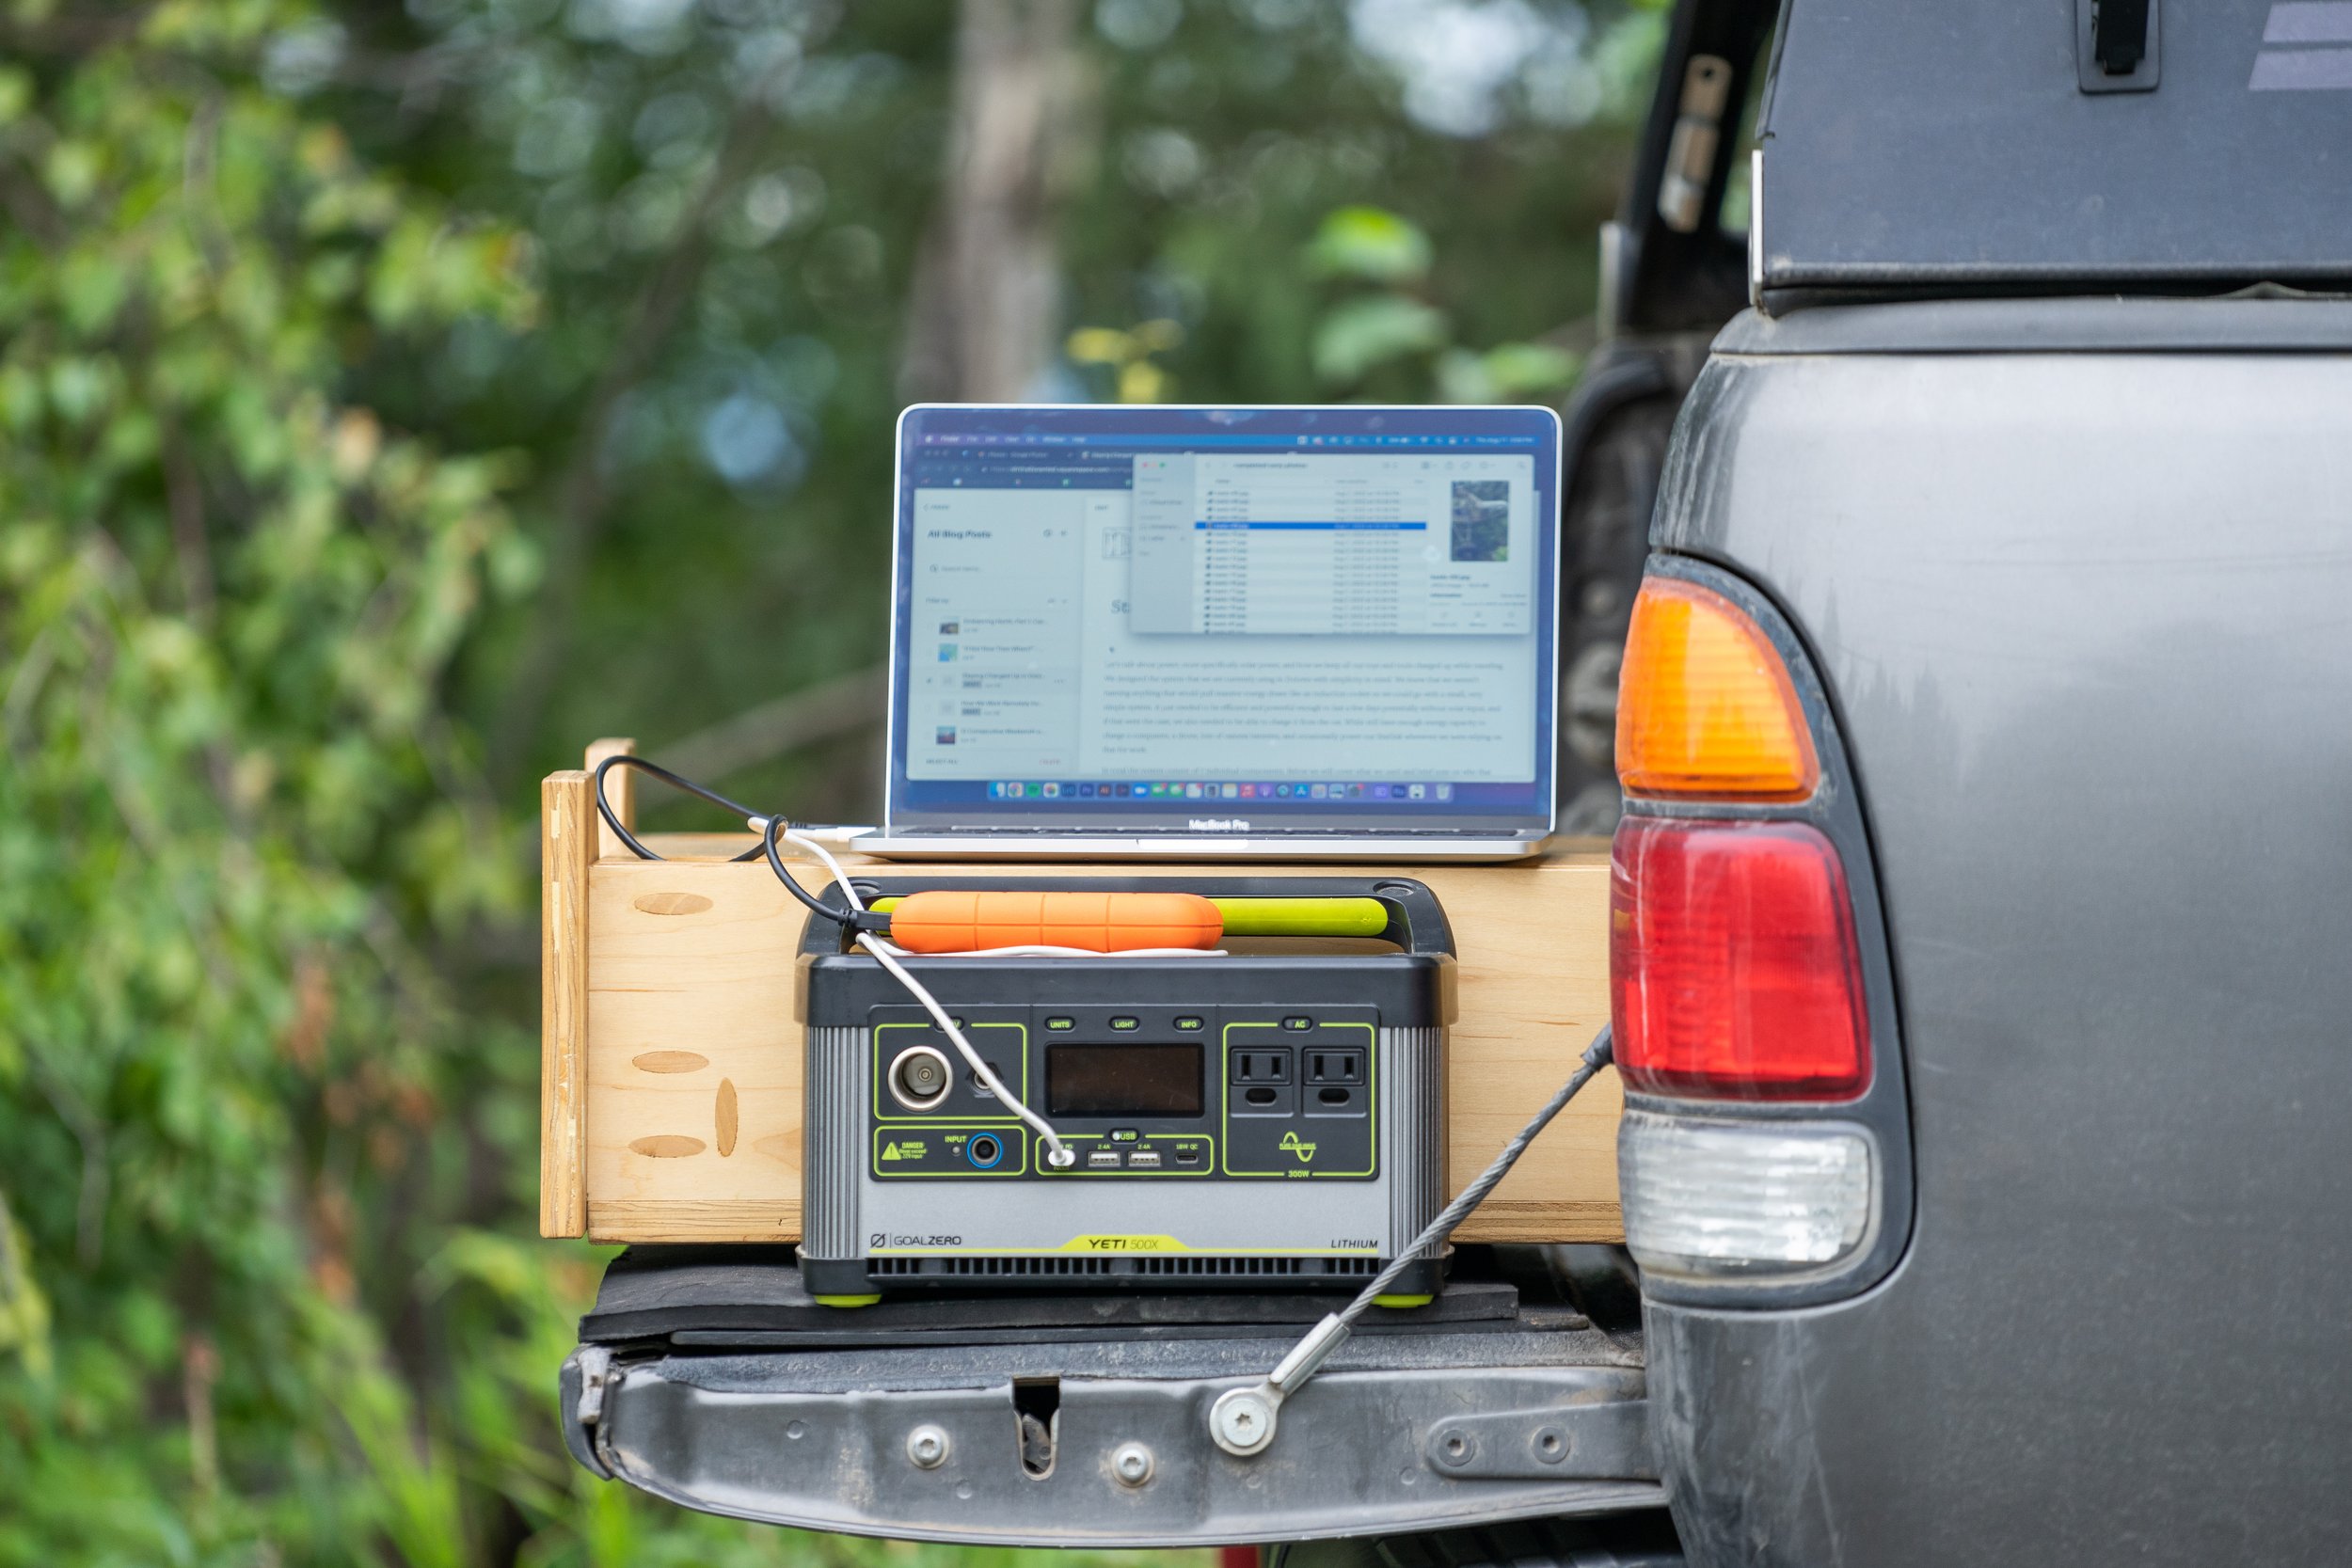
Since we originally made the post we have rebuilt the back of the truck and have made some minor changes to our system. That post can be viewed here, however, the core of this system remains the same. We expanded on our 12volt system by adding in a Blue Sea panel, witch allowed us to put things like our fridge, and several new 65w USB-C PD power ports on breakers and run individual circuits to them in a few different locations in the truck, as well as a lighting source for the back of our truck. Below is photo of the battery, panel, and one of the PD power ports.
3) 3M VHB Heavy Duty Mounting Tape
Like before we used this to mount the solar panels to our roof. We also learned just how strong this stuff truly is because we had to remove the previous panel so that we had space to add the 2 new panels. It is tenacious, to say the least, and let’s hope that this is truly the last time we need to remove anyone of these panels again! After this component, the new system starts to get a bit more sophisticated than the previous one.
4) 8AWG Solar Extension Cable with Female and Male Connector
These are used to extend the positive and negative wires that come off of the solar panels to a point where they are all then joined into a positive and negative bus bar.
5) 8 Ga. Heat-Shrink Ring Terminals, 1/4" Stud
These are added to the end of the solar extensions listed above so that they can then be bolted to the next item, the bus bar.
6) Battery Bus Bar 12V Marine 7 x 1/4" Power Distribution Block with Cover
This is the point where all the positive wires are brought together as well as the negatives. After the ring terminals are crimped and heat shrunk onto the solar wires they are then bolted to the corresponding positive or negative bus bar. At that point, the 3 solar panels can be reduced from 3 individual inputs down to a single positive or negative output, where they will eventually plug into the input port on our 1500x. It is possible to use a bus bar with fewer studs than the one we chose, just be sure to get the one with as many studs as your plan to make connections. We may still add 2 more additional panels to our build in the future so having some room for growth was important to us.
We used this to provide a water and weatherproof housing that would protect the bus bar from the elements, and to be sure that nothing would accidentally short across the 2 bus bars. These come in many shapes and sizes, we picked this one because it worked best for our particular needs within the space we mounted it. Ours is mounted on the roof rack in front of our camper between our spare fuel cans. However, this could have been mounted nearly anywhere.
These were used so that we could make a weatherproof port through the junction box that would allow us to connect the wires mentioned above on #4 to the bus bar.
After Connecting all the solar panel positives and negatives to their corresponding bus bars this was then used to make the connection from the bus bar ultimately to the battery charge input. We did this by using the ring terminals mentioned in #5 to connect to the bus bar and an Anderson Power Pole connection for the battery. We then finished the wire by wrapping it in a protective braided nylon sleeve.
10) Anderson Powerpole Connectors 45 Amp
We added these connections to the end of the marine wire listed in #7 so that we could plug into the Anderson Power Pole connection on the front of the battery. Using this port is what allows us to charge the battery with an input wattage up to 600w. We wrapped this connection in heat shrink to help stabilize the wires leading into so that they will hopefully not become damaged over time.
11) Alex Tech braided cable sleeve
We finished all exposed wires, including the wires leading from the solar panel to the junction box and the wire leading from the junction box to the charging input in this protective braided sleeve. It will help protect the cables from abrasion as well as UV damage from the sun. This also adds a nice finishing touch to the cables.
Tools
In addition to the added components there were several crimping tools that we needed to purchase to complete this job. Having the correct tools on hand will make all of these tasks so much simpler and easier while also increasing the quality of work.
Anderson Power Pole crimpers: These are needed to properly crimp the Anderson Power Pole connections mentioned in #10
Ratchet Terminal Crimper: These are needed to properly crimp the heat shrink insulated ring terminals mentioned in #5
IRWIN VISE-GRIP Wire Stripper: Though these are not needed they certainly make life a lot easier when it comes to easily and cleanly stripping wires.
Mini Heat Gun: using a heat gun of some variety on the heat shrink terminals will produce such a higher quality of work than using a lighter and burning the heat shrink with a flame.
Learn more about our solar systems in Dolores
We got the opportunity to partner with Renogy to add more solar to our rig which took us from 300W to 620W of solar!